Whether you’re running lithium, AGM, or lead acid, having accurate insight into your battery’s state of charge, voltage, and current draw is essential for staying off-grid with confidence. That’s why I installed the Victron BMV 712 smart display on my boat, which is now powered by a LiTime 320 amp-hour lithium battery. This is episode three of the Surf’s Up Build series, and it couldn’t be possible without Defender Marine, who helped me get my hands on this Victron equipment along with all the supplies in the rest of the build. They carry just about everything you’ll need on the water with fast shipping and great support.
Why I Chose This Model
A few reasons I went with the BMV 712 over other brands. I like the size — it takes up the exact appropriate amount of space necessary to read your battery’s power. I’ve used this interface before, so I’m familiar with the buttons, and I like that it has physical buttons instead of a touchscreen. But the main reason is the Bluetooth. It’s future-proof for any more Victron equipment I want to add, and I can display the data on the Victron Connect app from my phone. I also picked up a GX unit that I’ll eventually use to connect all the boat’s systems into one place for remote monitoring and display on a chart plotter.
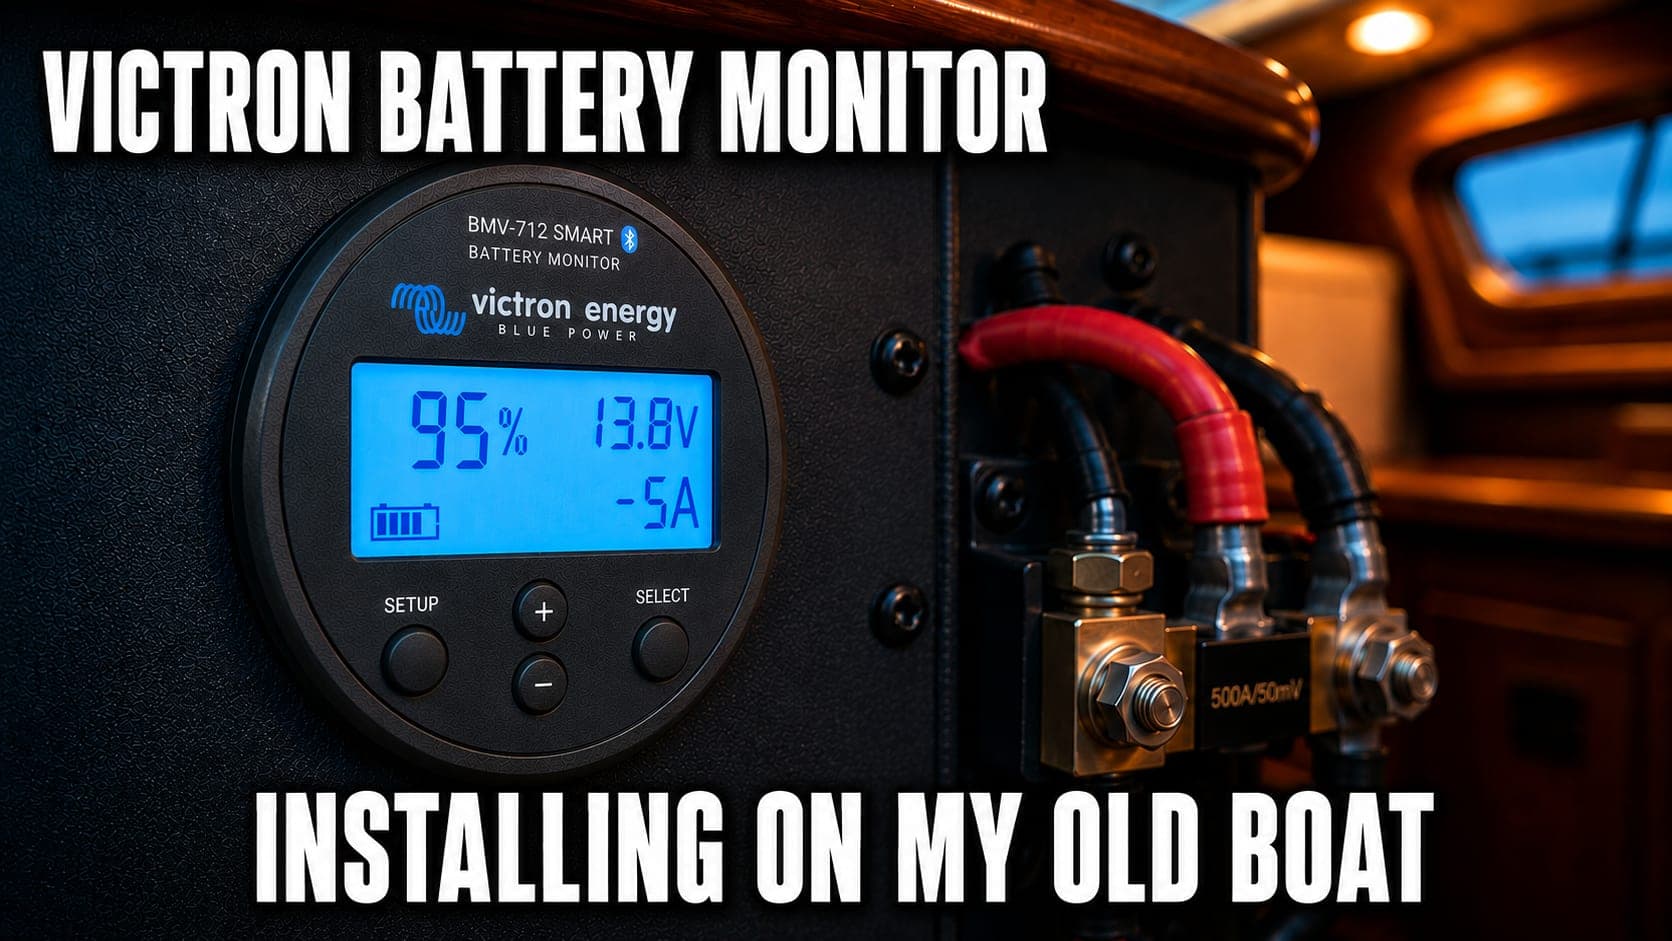
Inside the box you get the display unit — sleek, compact, styled in Victron’s matte gray — along with a mounting plate and screws. Then there’s the 500 amp precision shunt, which is the piece that does all the heavy lifting and actually reads the boat’s power. You also get a VE Direct cable that connects the display to the shunt, and two power cables with fuses that connect your battery directly to the shunt. Everything is clearly labeled and the wires come pre-prepared, so installation is about as painless as it gets.
Installing the Shunt and Display
There are really only two parts to this install: setting up the shunt and connecting the display. Before you start, disconnect the negative battery terminal — this prevents unwanted power from damaging anything and reduces your risk of meeting Mr. Shocky. The shunt gets mounted between the battery’s negative terminal and the rest of the vessel’s load. Every wire that was previously on the negative terminal now connects to the load side of the shunt instead, and only the shunt itself connects directly to the battery’s negative. This way, everything using power routes through the shunt and gets monitored. If you’re tackling this as part of a larger off-season upgrade, this is a natural addition to any electrical project.
For the display, you can mount it as a rounded face or use a square bezel with four screws. The bezel is probably more secure, but I always like to cut as few holes as possible in case I want to swap the unit out someday, so I went with the rounded face and the backing collar. The VE Direct cable is about 10 meters long, so your shunt and display can be a good distance apart — mine happened to be right next to each other. Once the display is mounted and the VE Direct cable is connected, the last step is running a fused positive wire from the battery’s positive terminal to the shunt for power. Reconnect the negative terminal and you’re in business.

Setup and Lithium-Specific Calibration
The initial setup is simple — input your battery capacity, select your auxiliary input (I chose none), and the display starts showing your battery data. On initial setup it assumes the battery is at 100 percent and sets the current voltage as its ceiling. The display will learn what 100 percent actually looks like over a couple charge cycles, but since I’m running lithium instead of lead acid, there are some additional settings to adjust. Everything up to this point is in Victron’s quick start guide, but the lithium settings are in the full manual.
I did all my configuration through the Victron Connect app over Bluetooth rather than the physical display. The pairing code was on the back of the unit itself, not the default one they suggest. The big change for lithium is the discharge floor — lead acid can only safely use about 50 percent of its capacity before voltage drops too low, but lithium can use almost all of it, so I set my discharge floor to 10 percent. I also changed the charge efficiency factor to 99 percent and the Peukert exponent to 1.05. Using my manufacturer’s voltage chart, I determined my battery was actually at about 25 percent state of charge and set that manually. I’ll be honest — I admittedly didn’t look all that deeply into every setting, but these have been working well. Always check with your manufacturer though, because wrong settings can give you false readings.
A couple weeks after the install, I realized I could check the state of charge through the Bluetooth feature on my LiTime battery itself. Turns out both readings were synced up and showing the same state of charge — so I either nailed my guess, my settings happened to be right, or a broken clock is right twice a day. I think the monitor is smart enough to learn on its own after a couple cycles. I also set up a low battery alarm, which is a nice safety net when you’re off the grid.

Second Battery Bank and What’s Next
One last feature I can’t personally use but wanted to mention: there’s a setting to monitor a second battery bank. I can’t do this because my lithium house bank and lead acid starting batteries have to be isolated from each other — connecting them to the same shunt as a ground would confuse the charger since they run at different voltages. But if you have a setup where both banks can share a common ground, all you do is connect the ground to the same shunt and run a second fused positive wire to the other bank.
After three episodes, I’ve got one operational and monitored lithium house system. It’s exciting to make this next step in modernizing the boat — in the future I hope to have permanent refrigeration, a new live well, and even full-time internet. The next episode covers installing solar, so subscribe if you want to see that. Let me know what you think of this build in the comments. Smooth sailing.
